How do I calibrate my Tachometer?
To get into PPR (Pulses Per Revolution) calibration, you will press and hold the button down while power the gauge on (or menu button if you have 2 on the front)
You will determine your PPR based on the chart below. While in calibration, pressing and releasing the button will cycle through the options.
After 5 seconds, the gauge will exit calibration and save the PPR the pointer is currently on, return to 0 then show the RPM reading.
If you have a dual speedometer + tachometer, then you will set the calibration on the screen display instead, holding button down while powering on, press and release button to cycle through menu options, hold the button for 3-4 seconds to select "Set pulses per rev" menu option, then press and release to increase PPR. The PPR will save after 5 seconds of inactivity.
Tachometer calibration
| Engine Configuration | Distributor-Based
(Single-Coil) | Wasted-Spark
(Distributorless / Coil Packs) | Coil-On-Plug
(COP) | OEM ECU
Connection | Aftermarket ECU
Connection |
|---|
| 12 Cyl (4-Stroke) | 6 PPR | 1 PPR | 0.5 PPR | 2 PPR | 6 PPR |
| 10 Cyl (4-Stroke) | 5 PPR | 1 PPR | 0.5 PPR | 2 PPR | 5 PPR |
| 8 Cyl (4-Stroke) | 4 PPR | 1 PPR | 0.5 PPR | 2 PPR | 4 PPR |
| 6 Cyl (4-Stroke) | 3 PPR | 1 PPR | 0.5 PPR | 2 PPR | 3 PPR |
| 4 Cyl (4-Stroke) | 2 PPR | 1 PPR | 0.5 PPR | 2 PPR | 2 PPR |
| 2 Cyl (4-Stroke) | 1 PPR | 1 PPR | 0.5 PPR | 2 PPR | 1 PPR |
| 1 Cyl (4-Stroke) | 0.5 PPR | 1 PPR | 0.5 PPR | 2 PPR | 0.5 PPR |
| 3 Cyl (2-Stroke) | 3 PPR | 3 or 6 PPR | 1 PPR | 3 or 6 PPR | 3 or 6 PPR |
| 2 Cyl (2-Stroke) | 2 PPR | 2 PPR | 1 PPR | 2 PPR | 2 PPR |
| 1 Cyl (2-Stroke) | 1 PPR | 2 PPR | 1 PPR | 1 PPR | 1 PPR |
Calibrating single gauge tachometer:
My fuel level gauge isn't working
The first step to troubleshoot fuel gauge issues is verifying a good connection on signal and ground to the sender. You can either inspect the connections closely, we recommend using a multimeter to measure the ohms at the harness on the gauge side. If you have 0 ohms or open line, you don't have a good connection or the sender is bad.
Next is to ensure it is calibrated, if you have done manual calibration both empty and full conditions need to be set, or it won't read accurately. If you have done a preset calibration, ensure that it matches the ohm range of your fuel sender.
If you don't have a multimeter or don't want to measure the ohms, you can cycle through the presets to see if one works. If not, do manual calibration.
The CJ series gauges are preset to 70-10 ohms and work with stock jeep senders.
If the pointer is rapidly moving, you likely have a bad ground. It could also be electrical interference if you have the signal wire routed near high voltage components like coils, or if it is combined with a fuel pump.
We recommend using our 2-wire fuel harness that runs a direct ground and signal to the sender.
If your gauge is staying at empty regardless of what preset you use, it likely has a bad connection and isn't getting an ohm reading. Every gauge is tested before it ships.
My temperature gauge is not working!
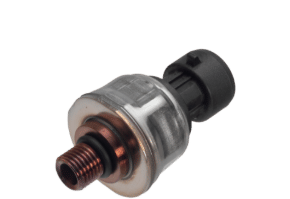
If you have just installed the gauge, ensure you are using the sensor provided as other sensors will not work.
If the gauge does not sweep on startup, it is not getting power. Verify the red, white, black power harness is connected properly.
If it sweeps but is not reading at all, ensure the signal harness is connected and pressed in firmly on both sides.
If it's still not working, test the signal harness for continuity with a multimeter. If you have both probes on the metal terminal and it reads "OL" or 0 ohms, the harness is bad. Call or email us to get a replacement harness. You can put paperclips in the harness connector if needed to get a good contact point.
If the harness is testing good, the next step is to measure ohms coming from the sensor while it is warm. Refer to the chart below, if the ohm reading is close to 0 or it's an OL, you need a new sensor. We recommend reading the ohms at the gauge side to verify it is getting to the gauge.
Temp Sensor Resistance Chart
| Temp C | Temp F | Resistance
(Ohms) |
|---|
| 60 | 140 | 238 |
| 65.55 | 150 | 199 |
| 71.11 | 160 | 168 |
| 76.66 | 170 | 144 |
| 82.22 | 180 | 125 |
| 87.77 | 190 | 108 |
| 93.33 | 200 | 94 |
| 98.88 | 210 | 82 |
| 104.44 | 220 | 71 |
| 110 | 230 | 61 |
| 115.55 | 240 | 51 |
| 121.11 | 250 | 43 |
| 126.66 | 260 | 36 |
What's so special about the GPS Speedometer?
They are incredibly simple and straightforward to install! Our GPS Speedometers connect to the Global Positioning System through an antenna, and don't require a transmission sensor. (The antennas are included with the GPS Speedometers, too!) This makes them very easy to install in vehicles that lack electronic sensor output.
What do I need to connect my Tachometer to?
You need to connect the tachometer to the vehicle's ignition system, or ECU tach output if applicable. Exactly where you connect to will depend on your vehicle's fuel delivery system. The PPR (Pulses Per Revolution) calibration will also vary based on where your signal is and how many cylinders your engine is.
If you have a single coil distributor, you will connect the signal to the negative coil terminal.
If you have a coil pack or coil on plug, you will connect to any trigger wire. (The wire that will be a different color from coil to coil)
If you have an OEM ECU, you will likely need a 4.7 KiloOhm pull up resistor tied to 12v to help strengthen the signal.
Do your Fuel Level gauges work with any sender?
Our fuel level gauges are programmable, they are compatible with any OEM or aftermarket resistance range. When setting up your gauge, follow the simple calibration setup found in the installation instructions.
Fuel Level Gauge factory default resistance settings are:
240 Ohms = Empty
33 Ohms = Full
Fuel Level Capacitance Universal Sender* (sold separately): If you are using a fuel level gauge from Speedhut with the Fuel Level Sender from Speedhut then use the gauge's factory default range (240 Ohms = Empty and 33 Ohms = Full).
*Additional electronics may be required for use with other brands' fuel level gauges (If used with a fuel level gauge from Speedhut then no additional electronics are required).
How accurate is your GPS? Does your GPS have a delay?
The GPS speedometer updates 4 to 5 times per second. The update rate is fast enough to not show any noticeable delay in keeping up with speed under hard acceleration or braking. Our GPS speedometer are used without issues in many performance cars!
How do I connect a Tachometer to a GM LS1-LS7 engine’s ECU?
Please view the diagram below for more information on how to connect a Speedhut Tachometer to an LS ECU.

Setup the Tachometer to run 2 pulses per rev when connecting it to the engines' ECU.
What happens if you exceed the maximum speed of the speedometer?
If you exceed your speedometer's maximum speed, the pointer will remain at the maximum speed position, and will not move below the maximum speed position until your speed drops back into a readable range.
Luckily for all of the speed-fiends out there, this will NOT damage the speedometer.
If the speed exceeds the analog range and you are using a GPS speedometer with an LCD display then you can use the digital speed display feature to view your current speed.
Does the GPS Speedometer ever drop signal?
Our GPS speedometers rarely drop signal. They use a powerful 'active' antenna which perform exceptionally well in all driving environments, including tall buildings, canyons, and extreme weather such as rain and snow. In most cases, the only time you will experience a signal loss is while driving in tunnels or in parking garages.
Why is my tachometer bouncing all over the place?
If your tachometer is constantly jumping around, it is likely electrical interference. You can try shielding the signal wire with aluminum foil or foil tape and tie each end to ground, it is pretty common as the components the signal wire ties to tend to be electrically noisy.
Can you change the length of the GPS antenna?
No, but we offer three different antenna lengths for you to choose from: 5', 9.8' and 15'.
Where should I mount the GPS speedometer antenna?
The best location for the GPS antenna to be mounted is on the roof of the vehicle. The GPS antenna is waterproof and magnetic. If the roof is inaccessible, the antenna can be mounted on the top of the dashboard in a place with maximum exposure to the sky.
Metal will block the GPS signal, but the GPS antenna can receive a signal through thin materials like wood, glass, fiberglass, and plastic.
Can you add my odometer mileage to my GPS speedometer?
Yes, we can do that for you!
Please tell us your mileage in the 'Order Comments', and we will program your odometer when we build your gauge.
If you already own one of these speedometers you can send it back to us and we can program the miles into the odometer (shipping charges will apply).