
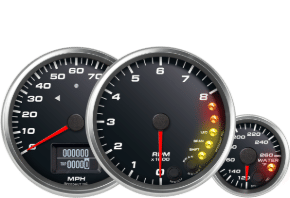
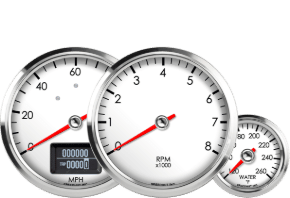
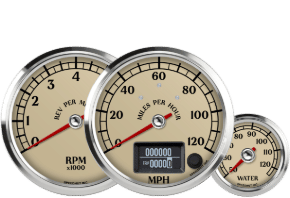
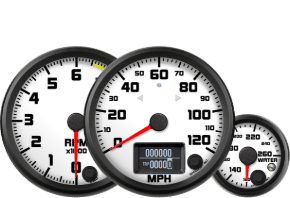
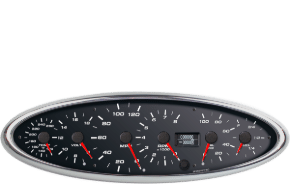
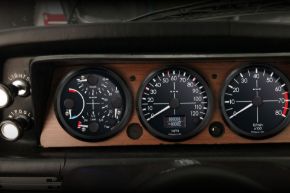
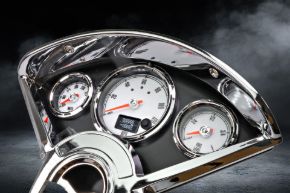

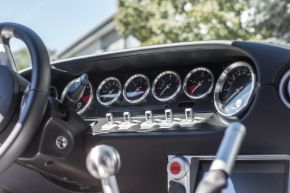
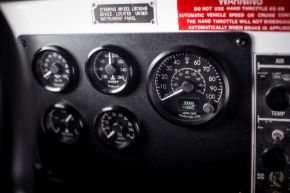
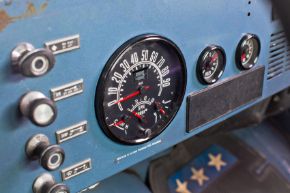
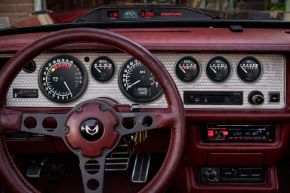
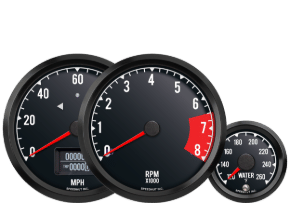
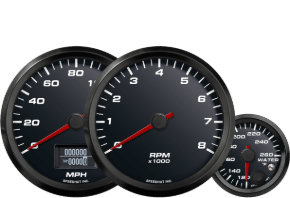
Humvee 5-Gauge Set | GPS Speedometer + Oil Pressure, 18-36V Volt, Water Temp, Fuel Level | TS/HB

SKU: HV-5KIT-001T
$1,181.40 USD
Built for military series HMMWVs, this 5-gauge set brings GPS speedometer and the key vehicle data you need into one clean package for a more dependable dash upgrade. Designed for rugged service conditions, it gives you clear, easy-to-read instrumentation with modern performance behind it. Precision stepper motor movement keeps every pointer smooth, stable, and accurate.
+ -
Order leaves our facility in about 2 Weeks

Humvee 5-Gauge Set brings GPS speedometer and the core vehicle data you need into one clean package built for military series HMMWV dashboards. GPS speed delivers real-time, calibration-free readings with no transmission connection or speed sensor required, while the rest of the set keeps oil pressure, 18–36V system voltage, coolant temperature, and fuel level easy to monitor at a glance. Precision stepper motors keep every needle smooth and steady. Built with durable housings and solid aluminum bezels, it’s made in the USA and backed for life.

Track-Tested. USA-Built. Backed for Life.

Key Features:

  • Complete 5-Gauge Package — includes GPS speed, oil pressure, 18–36V voltage, water temperature, and fuel level monitoring
  • Built for Military Series HMMWVs — designed for dependable use in Humvee dashboards and service environments
  • GPS Speedometer — real-time, calibration-free speed with no transmission sender required
  • Core System Visibility — keeps key vehicle data easy to read at a glance
  • Configurable Fuel Level Input — supports sender ranges up to 300 ohms
  • Settable Water Temp Warning Light — customizable alert point for rising coolant temperature
  • Microprocessor-Driven — real-time accuracy
  • Stepper Motor Precision — smooth, accurate pointer movement
  • Weather-Resistant Build — built for street, track, and off-road
  • Made in the USA — backed by a lifetime warranty

No calibration needed, the Military Humvee fuel gauge is calibrated to work with your factory sender! (0-30 ohms)

If you have a Civilian Humvee, you will need our universal fuel level gauge as the civilian version is different. 

Yes! The Military Humvee Oil Pressure gauge is designed to work with your factory sensor (0-32 ohms for 0-120 psi)

If you have a Civilian Humvee, you will need our universal oil pressure gauge

Yes! The Humvee Temperature gauge works with your stock sensor (2300 ohms for 120 F and 557 ohms for 240F).

If you have a civilian Humvee, you will need our universal temperature gauge.

Built to last. Backed for life.
  • Lifetime warranty on internal circuit board electronics
  • 5-year coverage on sensors and wiring
  • Applies to gauges purchased since Jan. 1, 2006

Every Speedhut gauge includes a lifetime warranty* on the electronic circuit board inside the gauge case. It is the core of the gauge — the part responsible for the precision communication that delivers the accuracy and performance Speedhut is known for.

Sensors, wiring, and other external components are covered by an unlimited 5-year warranty.

This combined lifetime / 5-year warranty applies to the original purchaser.
*For your lifetime — as long as you own the gauge — we stand behind it.

The first step to troubleshoot fuel gauge issues is verifying a good connection on signal and ground to the sender. You can either inspect the connections closely, we recommend using a multimeter to measure the ohms at the harness on the gauge side. If you have 0 ohms or open line, you don't have a good connection or the sender is bad.

Next is to ensure it is calibrated, if you have done manual calibration both empty and full conditions need to be set, or it won't read accurately. If you have done a preset calibration, ensure that it matches the ohm range of your fuel sender.
If you don't have a multimeter or don't want to measure the ohms, you can cycle through the presets to see if one works. If not, do manual calibration.
The CJ series gauges are preset to 70-10 ohms and work with stock jeep senders.

If the pointer is rapidly moving, you likely have a bad ground. It could also be electrical interference if you have the signal wire routed near high voltage components like coils, or if it is combined with a fuel pump. 
We recommend using our 2-wire fuel harness that runs a direct ground and signal to the sender.

If your gauge is staying at empty regardless of what preset you use, it likely has a bad connection and isn't getting an ohm reading. Every gauge is tested before it ships.

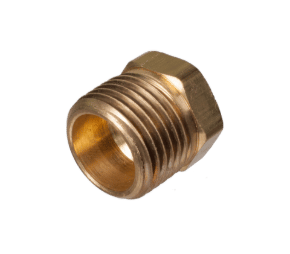
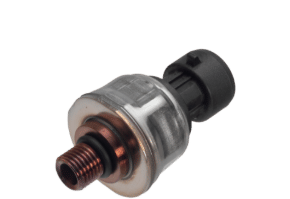
If the threads are wrong, you will need an adapter that changes your port to 1/8" NPT. We have some available, ensure you verify it is the right one.

If the sensor fits the threads but is too long, you can try trimming it up to but NOT past the notch. Trimming past the notch will damage the sensor. If it still does not fit, you can get a radiator hose adapter with a 1/8" NPT port.

If you have just installed the gauge, ensure you are using the sensor provided as other sensors will not work. 

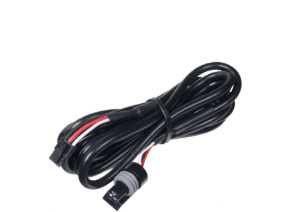
If the gauge does not sweep on startup, it is not getting power. Verify the red, white, black power harness is connected properly.

If it sweeps but is not reading at all, ensure the signal harness is connected and pressed in firmly on both sides.

If it's still not working, test the signal harness for continuity with a multimeter. If you have both probes on the metal terminal and it reads "OL" or 0 ohms, the harness is bad.  Call or email us to get a replacement harness. You can put paperclips in the harness connector if needed to get a good contact point.

If the harness is testing good, the next step is to measure ohms coming from the sensor while it is warm. Refer to the chart below, if the ohm reading is close to 0 or it's an OL, you need a new sensor. We recommend reading the ohms at the gauge side to verify it is getting to the gauge.

Temp Sensor Resistance Chart
Temp CTemp FResistance
(Ohms)
60140238
65.55150199
71.11160168
76.66170144
82.22180125
87.77190108
93.3320094
98.8821082
104.4422071
11023061
115.5524051
121.1125043
126.6626036


Ensure you are using our sensor, most other sensors will not work with our gauges.


With the harness disconnected from the sensor and the gauge powered on, measure the voltage across the red and black wires in the harness at the sensor end. Here you should see 4.9-5 volts. 


Once you have confirmed the voltage, short the red wire to the white wire, this should make the gauge sweep full scale. 


With the harness still disconnected from the sensor, go to key-on or start the car. With the sensor disconnected the gauge should stay at 0 or the bottom of the scale.


If all those turn out normally, next we'll test the sensor. Disconnect the harness from the gauge, and reconnect it to the sensor. Measure voltage between the white wire (signal from sensor) and black wire (ground) and you should see a range between 0.5 to 4.5 volts. You will need to supply power and ground to the sensor while it's disconnected from the gauge. You can use short paperclip pieces if needed.

They are incredibly simple and straightforward to install! Our GPS Speedometers connect to the Global Positioning System through an antenna, and don't require a transmission sensor. (The antennas are included with the GPS Speedometers, too!) This makes them very easy to install in vehicles that lack electronic sensor output.

Our fuel level gauges are programmable, they are compatible with any OEM or aftermarket resistance range. When setting up your gauge, follow the simple calibration setup found in the installation instructions.

Fuel Level Gauge factory default resistance settings are:
240 Ohms = Empty
33 Ohms = Full

Fuel Level Capacitance Universal Sender* (sold separately): If you are using a fuel level gauge from Speedhut with the Fuel Level Sender from Speedhut then use the gauge's factory default range (240 Ohms = Empty and 33 Ohms = Full).

*Additional electronics may be required for use with other brands' fuel level gauges (If used with a fuel level gauge from Speedhut then no additional electronics are required).

The sender and gauge must be grounded to the same source to operate correctly.

The sender's ground path is its mounting threads. Ensure that what the sender is threaded into is grounded to the same source as the gauge.

Use Teflon paste on the sender threads to secure the seal and maintain a secure ground connection. Teflon tape will NOT assist the ground connection.

Calibrate preset fuel level on dual Speedo/Fuel gauge:

Dual Speedo/Fuel manual calibration:

Manual calibration for standalone fuel level with float-style sender:

Calibrate your Quad gauge fuel level (manual or preset):

Calibrate EL-style fuel level (pre 2022 orders):

Test your float-style fuel sender:

The fuel level gauge can be manually calibrated to your existing fuel tank sender or you can select one of the preset calibration curves. Factory default setting is 240 ohms Empty and 33 ohms Full. No calibration is necessary on senders with this output.

***Selecting a calibration preset***

1. While gauge is powered up, press and hold button down for 10-12 seconds until pointer swings and stops at ‘1/8’ tank then release the button. You are now in calibration mode.

2. Press and release button to toggle between available resistive ohm options (see figure 1). Pointer will travel to each available setting with quick button press. At desired ohm range press and hold button down for 4 seconds to select that range.

3. Pointer will then travel to ‘E’ gauge will exit calibration menu and display current fuel level.

Note: On gauges with LED on front, the LED will blink 2 times to indicate the setting is saved.

*** Manual calibration***

Note: make sure fuel level sensor is hooked up to gauge and is at the appropriate empty or full state you wish to calibrate. Fuel level sensor MUST be attached to gauge during calibration procedure(s).

If your sensor is different from the preset ranges you can manually calibrate the gauge. You will need to program the 'Empty' resistance and the 'Full' resistance.

1. Follow steps 1 & 2 above and select (manual calibration ‘F’ see figure 1).

2. Release button (pointer will oscillate between ‘E’ and ‘F’.)

3. When pointer is at ‘F’ or ‘E’ - press and hold button for 4 seconds to calibrate that condition. For example: If the tank was drained with no gas you would select the Empty position ‘E’ on the dial.

4. Pointer will then travel to ‘E’ or ‘F’ depending on which end you are setting. Gauge will exit calibration menu and display current fuel level. Repeat procedure to set OTHER end point. Note: Until both empty and full points are calibrated the gauge will NOT display the fuel level accurately.

Note: On gauges with LED on front, the LED will blink 2 times to indicate the setting is saved. You can reset gauge calibration as many times as needed by repeating above steps.

Ohm options diagram

The process of programming a fuel level gauge is detailed in the instructions.

Click here to download our fuel level gauge installation and operation instructions.

The GPS speedometer updates 4 to 5 times per second. The update rate is fast enough to not show any noticeable delay in keeping up with speed under hard acceleration or braking. Our GPS speedometer are used without issues in many performance cars!

Fuel Level Sender Presets
PresetFactory Sensors / ApplicationFuel Empty
(Ohms)
Fuel Full
(Ohms)
Preset 1/8Speedhut default24033
Preset 1/4Jeeps, pre-87 Fords, Chryslers7010
Preset 3/8Humvee030
Preset 1/2GM 65–present090
Preset 5/8—10180
Preset 3/4—900
Preset 7/8Fords 87–present16158


Resistance Values by Tank Level
Ohm Range1/4 Tank
Ohms
1/2 Tank
Ohms
3/4 Tank
Ohms
240 / 3318813684
70 / 10554025
0 / 307.51522.5
0 / 9022.55567.5
10 / 18052.595137.5
90 / 067.55522.5
16 / 15851.587122.5

If you exceed your speedometer's maximum speed, the pointer will remain at the maximum speed position, and will not move below the maximum speed position until your speed drops back into a readable range.

Luckily for all of the speed-fiends out there, this will NOT damage the speedometer.

If the speed exceeds the analog range and you are using a GPS speedometer with an LCD display then you can use the digital speed display feature to view your current speed.

Making a comparison to a Temperature Gun reading should be used as a basic comparison only. A temperature gun only measures surface temperature, and does not measure internal temperature. Surface temperature will always be cooler than the coolant inside the engine. A common temperature difference would be between 5 and 25 degrees, between the water temperature gauge and a temperature gun. This depends on the efficiency of the component being shot with the temperature gun to dissipate heat. So, if your gauge reads 195 and you point & shoot and get a reading of 185, you can safely assume that you are seeing a reasonable, and realistic comparison. Only use a temperature gun to make basic temperature comparisons. Understand, that when everything is working correctly, the gauge will usually read higher since the gauge measures core temperature, and the temperature gun measures surface temperature.

Our GPS speedometers rarely drop signal. They use a powerful 'active' antenna which perform exceptionally well in all driving environments, including tall buildings, canyons, and extreme weather such as rain and snow. In most cases, the only time you will experience a signal loss is while driving in tunnels or in parking garages.

Fuel Level Capacitance Universal Sender* (sold separately): If you are using a fuel level gauge from Speedhut with the Fuel Level Sender from Speedhut, use the gauge's factory default range (240 Ohms = Empty and 33 Ohms = Full).

*Additional electronics maybe required for use with other brands' fuel level gauges (If used with a fuel level gauge from Speedhut, no additional electronics are required).

No, but we offer three different antenna lengths for you to choose from: 5', 9.8' and 15'.

The ideal spot for mounting the GPS antenna is on the roof of your vehicle. This antenna is both waterproof and magnetic. If the roof isn’t an option, you can place it on the top of the dashboard, ensuring it has the best possible exposure to the sky.

Metal can obstruct the GPS signal, but the antenna is capable of receiving signals through thinner materials such as wood, glass, fiberglass, and plastic.

Yes, we can do that for you!

Please tell us your mileage in the 'Order Comments', and we will program your odometer when we build your gauge.

If you already own one of these speedometers you can send it back to us and we can program the miles into the odometer (shipping charges will apply).

Product reviews
Only registered users can write reviews
Customers who bought this item also bought

SKU: HV3-TC1

3-3/8" Humvee Diesel Tachometer | 6K RPM

Tracks engine RPM in military series HMMWVs with support for alternator, crank sensor, and magnetic pickup signals. Built for clean integration across diesel Humvee setups. Precision stepper motor delivers smooth, stable, and accurate readings.
$226.48 USD
SKU: R2-B3-REV

2-1/16" Boost Gauge | 0-20 PSI | Warning Light

Tracks boost pressure in real time for accurate monitoring of turbo and supercharger performance. Integrated warning light provides clear alerts when boost moves outside your set range. Helps identify spikes, drops, or inconsistencies under acceleration and load. Precision stepper motor ensures smooth, stable readings.
$235.17 USD
SKU: R2-ET1-REV

2-1/16" EGT Temperature Gauge | 200-1600°F | Warning Light

Provides accurate real-time exhaust gas temperature monitoring for tuning, load, and performance use. Helps protect the engine by making lean conditions and rising temps easier to spot, while a built-in warning light adds a clear visual alert. Precision stepper motor delivers smooth, stable readings.
$244.36 USD
SKU: R45-TC3-DATZ

4-1/2" Shift Light Tachometer | 8K RPM | Datsun Z

Tracks engine RPM with built-in, high-visibility shift lights so you can hit your marks every time. Designed to work across a wide range of engines for clean, flexible installs. Precision stepper motor delivers smooth, stable, and accurate readings.
$264.88 USD